以Server的模式运行pgAdmin4
pgAdmin4 是随PostgreSQL9.6推出的新一代PostgreSQL管理工具。
pgAdmin4默认是以python的server端和qtwebkit的客户端的组合但桌面工具发布的,README中也说了可以以独立的Server模式运行,本文(以python2.7为例)就介绍下Ubunte(CentOS相差不多)下如何编译并以Server模式运行它。
首先安装virtualenv虚拟环境
sudo pip install virtualenvwrapper
virtualenv pgadmin4
cd pgadmin4/
source  bin/activate
下载pgAdmin4的源代码包,两张模式
wget https://ftp.postgresql.org/pub/pgadmin3/pgadmin4/v1.1/source/pgadmin4-1.1.tar.gz
tar xf pgadmin4-1.1.tar.gz
cd pgadmin4-1.1/
或者
git clone git://git.postgresql.org/git/pgadmin4.git
cd pgadmin4
requirements_py2.txt有个小bug,fix先,安装前确保PostgreSQL 开发库已经安装,否则报pg_config未找到的错误,具体安装方法如下,
sudo apt-get install libpq-dev
#如果是CentOS,可以使用下面的命令,
#yum install postgresql-devel
然后安装依赖库
sed -i 's/;.*//' requirements_py2.txt
pip install -r requirements_py2.txt
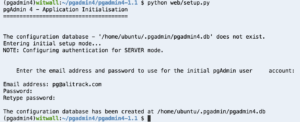
安装pgAdmin4,按提示输入邮箱地址和密码,
python web/setup.py
(pgadmin4)witwall:~/pgadmin4/pgadmin4-1.1 $ python web/setup.py
pgAdmin 4 - Application Initialisation
======================================
The configuration database - '/home/ubuntu/.pgadmin/pgadmin4.db' does not exist.
Entering initial setup mode...
NOTE: Configuring authentication for SERVER mode.
    Enter the email address and password to use for the initial pgAdmin user     account:
Email address: pg@alitrack.com
Password:
Retype password:
The configuration database has been created at /home/ubuntu/.pgadmin/pgadmin4.db
到这一步,就算基本安装完成,可以运行了,
python web/pgAdmin4.py
然后你会发现,只能本机访问,端口是5050,这不是我想要的,
Starting pgAdmin 4. Please navigate to http://localhost:5050 in your browser.
接下来我们对配置文件做些修改,
cat >>web/config_local.py << EOF
# -*- coding: utf-8 -*-
from config import *
#设置你希望的IP,0.0.0.0表示不受限制,如果你只希望局域网内访问,请使用适当的局域网ip
DEFAULT_SERVER = '0.0.0.0'
#设置你希望的端口
DEFAULT_SERVER_PORT = 8080
EOF
再次运行下看,
python web/pgAdmin4.py
Starting pgAdmin 4. Please navigate to http://0.0.0.0:8080 in your browser.
最后,帮助文档也编译下,
pip install sphinx
make docs
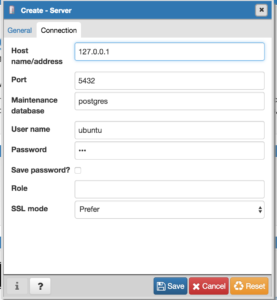
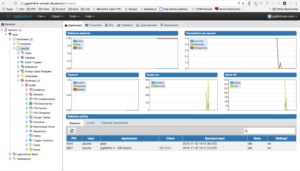
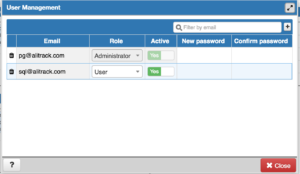
无图无真相,


